Ultrasonic testing systems| 100 MHz |PhasisBLU

PhasisBLU, for fast, simple use in production – reliable testing without profound ultrasonic knowledge.
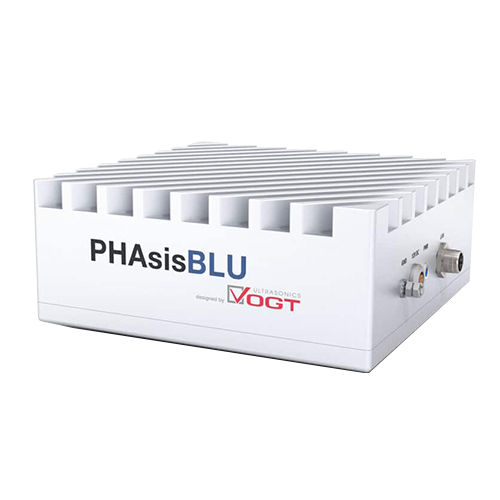
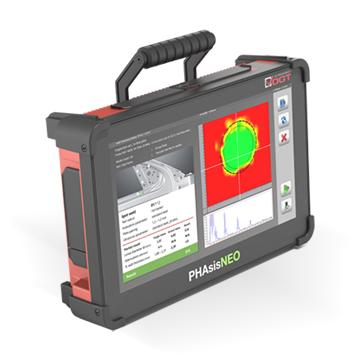
PHasisBLU picture

Test automation allows significant savings while ensuring the best possible reproducibility of measurement results. Here, man and robot work hand in hand. Inspection systems from the combination of PHAsisBLU and robotic technology contribute to future-oriented quality assurance as well as detailed documentation of inspection results.


For the precise testing of resistance welded spots of steel and aluminum, we have developed the PHAsis® mobile ultrasonic testing device. It replaces the destructive hammer & chisel specimen. PHAsis® is the first phased array spot weld tester (PAUT) with a physical resolution of the weld line diameter more accurate than 0.35 mm. It is ideal for testing 2- and 3-sheet joints with a single sheet thickness of 0.6 – 5mm. PHAsis® was specially developed for time-saving use in production. In addition to manual testing, it is also suitable for use with robots

Advantages

  • Key Visualization: C/D scans illuminate the weld, providing clarity and precise detail.
  • High Resolution: More than 700 measuring points ensure superior resolution for pinpoint welding lens diameter accuracy.
  • Easy assessment: Automatic image-based suggestions for reliable inspection without the need for ultrasound expertise.
  • Inspection speed: Accelerated inspection thanks to simultaneous scanning of large areas.
  • Versatile Probes: Universal probes eliminate the need to change equipment for different sample types.

Benefits

  • Imaged display: direct visualization of weld beads via C/D scans for simplified quality assessment.
  • High resolution: more than 700 measuring points for precise determination of the welding lens diameter.
  • Automatic assessment: assessment suggestions based on predefined parameters, facilitating inspections without ultrasonic expertise.
  • Fast inspection: Reduced inspection times thanks to simultaneous scanning of a large area.
  • Probe universality: No need to change probes for different samples, simplifying the inspection process.

PhasisBLU
Dimensions200 x 200 x 82 mm
Weight2.500 kg
PC BoardIntel Pentium QuadCore @ 2,0 GHz, 8 GB RAM, 512 GB SSD
Protection classIP 64, restricted
Phased Array test channels128, 16 thereof parallel
Digitization rate100 MHz
Communication1 X LAN, 1 GBit/s
Max. IFF20 KHz
Max. pulse amplitude+/- 100 V (neg. square pulse)
Band width (-3dB)0.5 - 25 MHz
Pulse width≥ 5 ns
Focal Laws> 700 (virtual probes)
Power supply100 - 240 VAC 50 Hz - 60 Hz
Operation temperature0°C - 40°C
Relative Humidity80%, non-condensing
Cooling passive(no fan)
HousingCNC made aluminum housing, IP 64, passive cooling

Standard Probe

TypePhased Array 2D Matrix
Number of elements11 x 11 arranged in square
CableLong-Life 2.5 m; 5 m for robot applications
Nominal frequency12 MHz20 MHz
Inspection area9 x 9 mm11.7 x 11.7 mm
Physical resolution more precise than0.35 mm0.45 mm

Software

Administration and communication:
  • Access rights and user management
  • Test equipment monitoring and management of inspection devices
  • Management of plate pairing and materials
  • Various interfaces such as test plan import, result export or communication interface for automated testing
Inspection:
  • "Inspection according to test plan" mode: secures testing with 100% fulfillment and enables safe testing with minimal training
  • Improved setup of inspection plans and easy to go inspection according to proven standards of conventional ultrasonic inspection
  • "Free testing" mode: fast testing without a test plan with instantly selectable standard or individual parameter setsManagement of plate pairing and materials
  • Inspection mode for highly sound-attenuating materials or very rough surfaces
  • Multiple modes for detection of cladding
  • Access to all setting parameters at any time for the implementation of individual evaluations
Data management:
  • Creation and administration of test plans and free testing
  • Transfer of the results of the free testing into new test plans
  • Management of plate pairings, evaluation and ultrasonic parameters
  • Inspection plans on all devices by means of synchronization
  • Individual color display of spot welds (D-Scan)
  • Test reports can be exported as Word, Excel or PDF documents. Two different types of reports available: detailed and compressed
  • Predefined, universal ready to go setups as well as the creation of individual advanced setups